A plate of pasta that tastes incredible can look completely flat in a photo.
A simple bowl of soup, shot right, can make someone stop mid-scroll. The difference isn't the food — it's the light, the angle, and what's going on around the plate.
Getting those three things right doesn't require professional equipment. It just requires paying attention.
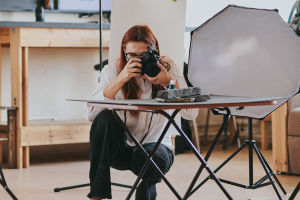
Get the Light Right First
Natural light from the side is the go-to setup for most food photos. Place the dish near a window, position yourself so the light hits the food from the left or right rather than straight on, and the texture of almost any ingredient immediately starts to show up.
Avoid midday direct sun — it creates harsh highlights and deep shadows that aren't flattering. Use a sheer curtain to soften it if needed. If you want warmth without sunlight, a daylight LED panel works well. Keep color temperature consistent and lean toward warmer tones — they make food look more appetizing than cool or blue-toned light.
Match the Angle to the Dish
Overhead shots work beautifully for flat, spread-out food — pizza, a grain bowl, a platter of pastries. The 45-degree angle is the most natural and versatile option, showing both the top and the side of a dish, making it ideal for layered food like a sandwich, a slice of cake, or a plate with height.
A straight side angle works for tall items — stacked items, drinks with layers, anything where the structure matters. Don't commit to just one angle; shoot from multiple positions and decide later which one tells the story best.
Style the Plate Before You Shoot
Keep plates and surfaces clean — not a single crumb or sauce drip that wasn't intentional. Use simple props: a linen napkin, a wooden board, a plain ceramic bowl. These add context without competing with the food. For color, one contrasting garnish goes a long way — a sprig of green on a brown dish, a few fresh berries on cream. Leave some empty space around the main subject.
Negative space gives the food room to breathe and draws the eye directly to it. A crowded frame looks messy; a bit of emptiness makes the whole image feel composed.
Shoot Fast, Especially With Hot Food
Fresh food looks best right after it's plated. Steam rises, surfaces glisten, and colors are at their most vivid. Set up your lighting and background before the food is ready, then work quickly once it's plated. Use burst mode to catch that brief window where everything looks perfect. For close-up shots, tap to focus directly on the most interesting part of the dish — a sauce drizzle, a cross-section, the top layer of a dessert.
Edit Lightly and Keep It Real
A small adjustment to exposure, contrast, and white balance goes a long way. Slightly warmer white balance makes food look more inviting. Bring up the contrast just enough to give the image some punch. Avoid over-saturating — oversaturated food looks artificial, and nothing kills appetite faster. The goal is to make the photo look like the food at its very best moment, not a version of itself that doesn't actually exist.
Great food photography tells a small story — a steaming mug, hands reaching for something fresh, a beautifully simple plate on a clean surface. The details and context are what turn a menu shot into something worth looking at twice.